Overview
Use Poolside Chat to work with Poolside from your browser. You can ask questions, iterate on drafts, reopen earlier conversations, and use agent-backed chat workflows without opening your IDE. Poolside Chat uses agents configured in your organization. The agent you select determines how the conversation works, including which model it uses and which tools are available. Poolside Chat is best for:- Getting help from anywhere inside your organization’s network
- Exploring an idea before you move into the IDE or CLI
- Drafting summaries, plans, notes, and other written output
- Explaining concepts, code, or architecture from pasted context
- Returning to saved conversations and continuing earlier work
Key features
- Choose from agents with different models, tools, and capabilities
- Start a new chat
- Continue a multi-turn conversation with the selected agent
- Reopen recent conversations from the sidebar
- Search conversations and open common actions with
Command+K(macOS) orCtrl+K(Windows and Linux) - Manage personal settings and developer API keys
Get started
Prerequisites- Access to your Poolside Chat URL. If you do not have the URL, contact your Poolside administrator.
- Access to at least one agent, or the
Create Agentpermission. If you have neither, contact your Poolside administrator.
Sign in
Open Poolside Chat in your browser. The URL is typically within your Poolside subdomain, for example
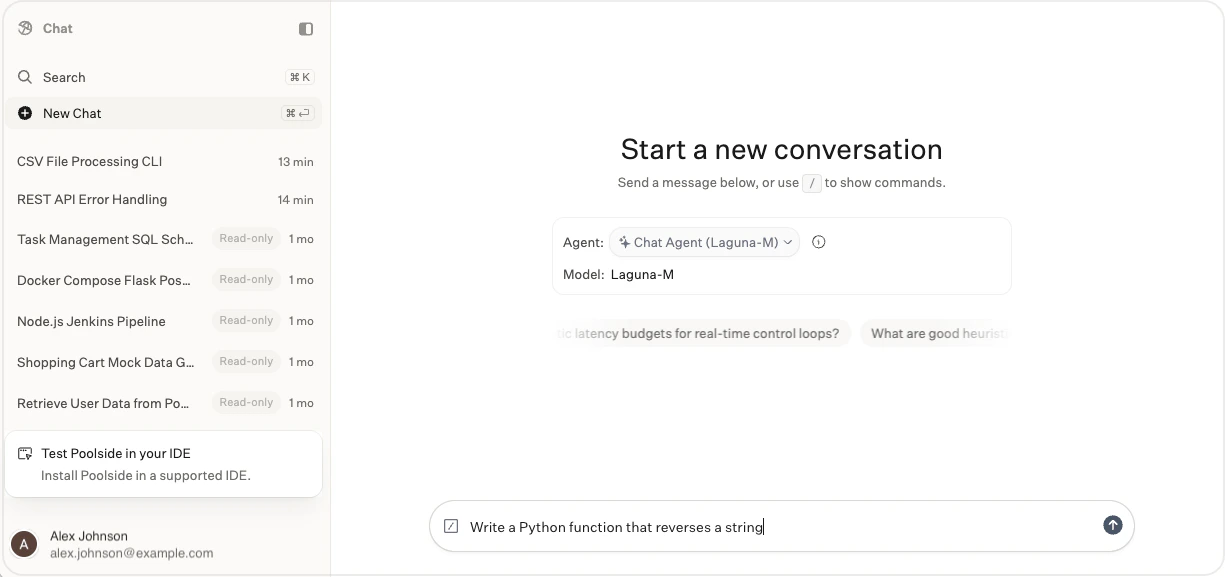
https://chat.poolside.yourdomain.com.Sign in using your organization’s OIDC provider.Set up or select an agent
If Poolside prompts you to set up your first agent, select Create with defaults for a fast start or Create from scratch if you want to configure it yourself.For more information about configuring agents, see Managed agents.If multiple agents are available, choose one from the selector below the prompt box before you send your first message.
Ask your first question
Start with a question that helps you think through a real engineering task.For example:Continue the conversation with follow-up prompts to refine the answer, narrow the scope, or turn the response into something you can use.For example:
Find the conversation later
Poolside saves conversations automatically, so you can return to them later and continue where you left off.Reopen a saved conversation from the sidebar when you want to continue working on the same topic.You can also use search from the sidebar or by pressing
Command+K (macOS) or Ctrl+K (Windows and Linux) to find previous conversations quickly.Select an agent
Use the agent selector in the prompt box to see the agents available to you, then select the one you want to use. The agent you choose determines the model and tools available in the conversation. To review what the selected agent can do, click the info icon next to the selector. The details panel shows the agent’s model and available tools. To open the full agent configuration, click View agent.Search and navigate
Use the sidebar to return to recent conversations. Select New Chat when you want to start over with a fresh session. Some conversations are labeled Read-only. These are migrated Poolside Web Assistant conversations that you can reopen for reference only. You cannot continue them in Poolside Chat. Use search when you need to find conversations or open common actions. Open search from the sidebar or by pressingCommand+K (macOS) or Ctrl+K (Windows and Linux).
From the search dialog, you can:
- Find recent or matching conversations.
- Select Toggle Theme to change between light and dark mode.
- Select Zen Mode On to hide the sidebar. To turn Zen Mode off, press
Command+K(macOS) orCtrl+K(Windows and Linux) to open search, then select Zen Mode Off. - Open About Poolside to view deployment build details for your environment.
- Navigate to Developer API Keys or select Developer Settings to manage personal settings.
- Navigate to Poolside Console if you belong to a team with the
tenant-adminrole.
Esc or click outside the dialog.
Manage personal settings
To access your personal Poolside Chat settings, click your username and then select Developer Settings. You can set preferences such as:- Wrap lines in code snippets
- Enable font ligatures in code snippets
- Change the theme to light, dark, or system mode
- Set or change the URL of your API server (requires the
tenant-adminrole)